Bricked Yealink T54W recovery
How to Guide on recovering a Yealink phone stuck in a boot loop
The below instructions are to recover a Bricked T54W that is currently stuck at the booting stage. The phone is stuck at “Welcome initializing please wait” but these instruction will also work for other models of Yealink phones (T53W or the T57W).
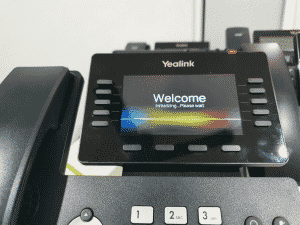
Yealink phones can get stuck in this state for a few reasons, in this case this phone got stuck in this boot loop while simply pushing an extension configuration to it from 3CX but the phones can end up this way from things such as a firmware upgrade gone wrong, incorrect firmware version used or there was a required firmware in-between the firmware used that wasn’t present.
Never fear, we can bring this phone back to life.
The method below works if your firmware version was at the 96.86.x.x or above version. If are you on the 85 or 84 you need to get the older recovery software from Yealink which comes with 3 files instead of 2 but the method to recover is exactly the same process except you just rename 3 files instead of 2.
However the phone ended up this way we can recovery it pretty easily.
You get 2 options for recovery on these phones
-
TFTP
-
USB
We’re going to use TFTP
The things you will need to recover the phone are
-
A TFTP Program (see link below to get TFTP32)
-
The Yealink recovery software (see links below for direct download from Yealink)
-
a PC on the same LAN network as the bricked T54W
Step 1.
Install a TFTP program
Download TFTP32 from here
Use the Tftpd32-4.60-setup.exe version, the 64 didn’t work for me but this version did (even though I’m on a windows 10 64bit PC)
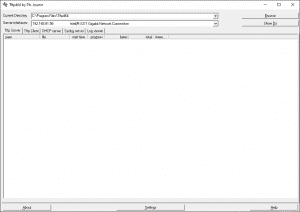
Install it and run it. Make sure you have your network interface on your PC selected from the dropdown at the top and not the “Loopback interface“
Step 2.
Download the Yealink Recovery Software
Download the Yealink Recovery Software directly from Yealink here
(Old Recovery Files can be downloaded directly from Yealink here)
Once downloaded, extract the files (using rar or winzip) you will now have 2 sets of files in the extracted folder (or 3 if you are using the older version recovery software)
T53-T53W-T54W-T57W.bin
T54W(T57W,T53W,T53,T53C,T54,T57)-96.86.0.23.rom
We need to rename these files, right click on the files and change the file name to the below
T54W.bin & T54W.rom (or T53W.bin if you are recovering a T53W etc)
Now go back to our TFTP32 program and click the Browse button to browse to the RM NEW extracted folder that contains our renamed files so TFTP32 knows to use that folder for the recovery files.
Step 3.
Put the phone into recovery mode
To do this: power the handset down by either pulling its power cord or popping out the PoE Ethernet cable.
While the phone is powered down press and hold the Redial key and then while still holding the Redial key, place the power cable or PoE Ethernet cable back into the phone.
The phone will begin to boot and you will see “Welcome initializing please wait” for a few seconds and then it will present you with the below screen
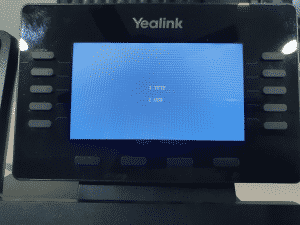
Press 1 on the key pad to select the TFTP method
Now at this point the phone needs to have some network settings configured.
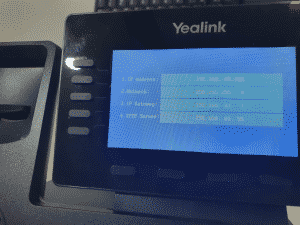
What we’re basically doing here is telling the phone what it’s own IP address will be and then telling it what it’s gateway is (your router) and then we are telling it where to look for the recovery files (your computer running TFTP32).
The PC I’m running TFTP32 on has an IP of 192.168.81.55 so in the bottom TFTP Server: part I put in my computers IP address
To find out your computers IP address, just go to your windows button and click it once, now type cmd and hit enter, a black dos box will open up, in this box type ipconfig and hit enter and it will spit out some information, you are looking for the the IPV4 Address / Subnet Mask / Default Gateway. This is the information you need to put into the phone.
Example:-
Ethernet adapter Ethernet:
Connection-specific DNS Suffix . :
IPv4 Address. . . . . . . . . . . : 192.168.81.55
Subnet Mask . . . . . . . . . . . : 255.255.255.0
Default Gateway . . . . . . . . . : 192.168.81.1
The IP Address field is going to be the IP address of the phone. Pick an address that is not already in use on your network. In my example I used 192.168.81.100. You need to use the subnet information that matches your network which will be different to mine, it will likely be something like 192.168.0.x or 192,168.1.x or even 10.0.0.x. This is the information you got from your ipconfig command in the dos box.
The IP Gateway is your routers address, it is the Default Gateway address shown in your ipconfig information (mine: 192.168.81.1).
The TFTP Server address is your computers IPv4 Address that you got from the ipconfig information (mine: 192.168.81.55).
Once you have input all this information into the phone you can proceed to the recovery process.
Step 4.
Start the recovery process
Once you have setup the network information in the Yealink T54W just hit the OK button on the phone and the recovery process will begin
Do not touch anything on the phone or the TFTP32 program, just let the phone grab the software from your PC and go through the process
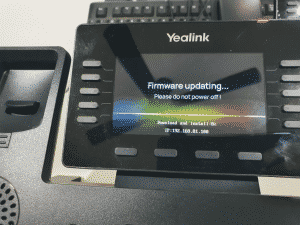
You will see this happening on the phone
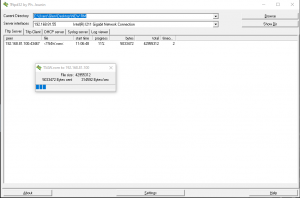
And this happening on TFTPd32 on your PC
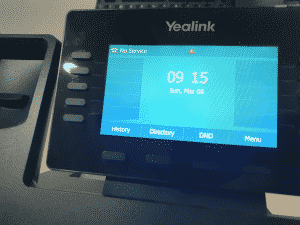
Once the files are transferred over the phone is recovered and it will go through it’s normal booting process and you can once again start using the phone
Contact Us